

Time Capsule Preparation & Placement InstructionsUse
Placing a time capsule is a meaningful, one-time experience. Proper preparation ensures your items remain protected, sealed, and preserved until the moment they’re rediscovered.
These instructions walk you through how to prepare, seal, and place your time capsule using simple, proven steps. No special tools are required.
You can print this page for easy reference during placement or installation.
Simply use your browser’s print option (File → Print or Ctrl/Cmd + P).
1. Prepare and Pack Your Time Capsule Contents
Before sealing your time capsule:
-
Ensure all items are completely dry
-
Use protective packaging such as high-quality vacuum-sealed bags for paper items, letters, and photographs
-
Add moisture-absorbing desiccant inside packaging and inside the capsule
-
For digital items (USB drives, memory cards), use anti-static packaging with desiccant
-
Arrange keepsakes cleanly and intentionally to prevent shifting
Proper preparation greatly improves long-term preservation and protects contents from moisture and air exposure.
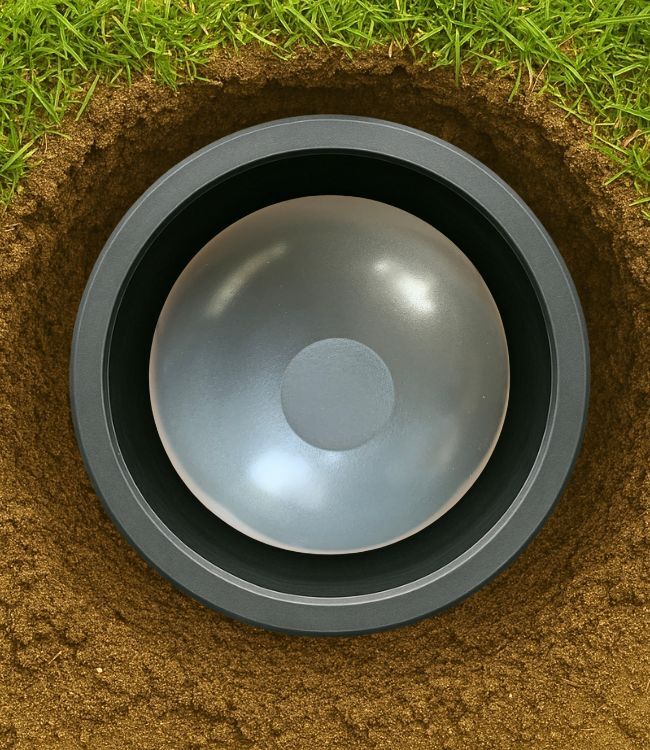
2. Install and Seal the Time Capsule Cap
Sealing the cap is quick and straightforward.
-
Set the cap on top so it rests naturally in place
-
Rotate the cap counter-clockwise until it gently drops into alignment
-
Turn the cap clockwise until hand-tight against both O-rings
-
Do not force the cap — if resistance is felt, back it off and try again
A firm hand-tight seal is all that’s required.
No tools are needed.
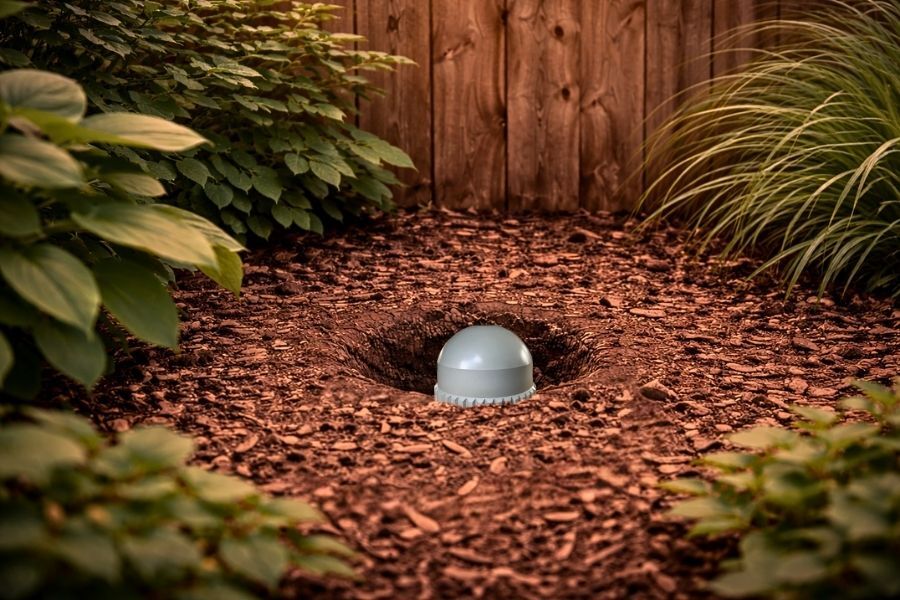
3. Choose the Best Placement Location
Select a stable location where the time capsule is unlikely to be disturbed.
-
Most customers place their time capsule with 8–10 inches of soil cover
-
Deeper placement may be preferred for long-term time capsule storage
-
Avoid low-lying areas that may flood or collect standing water
-
Avoid locations subject to landscaping, digging, or future construction
Once placed, the time capsule is intended to remain undisturbed until retrieval.
4. Optional: Assisted Placement Method
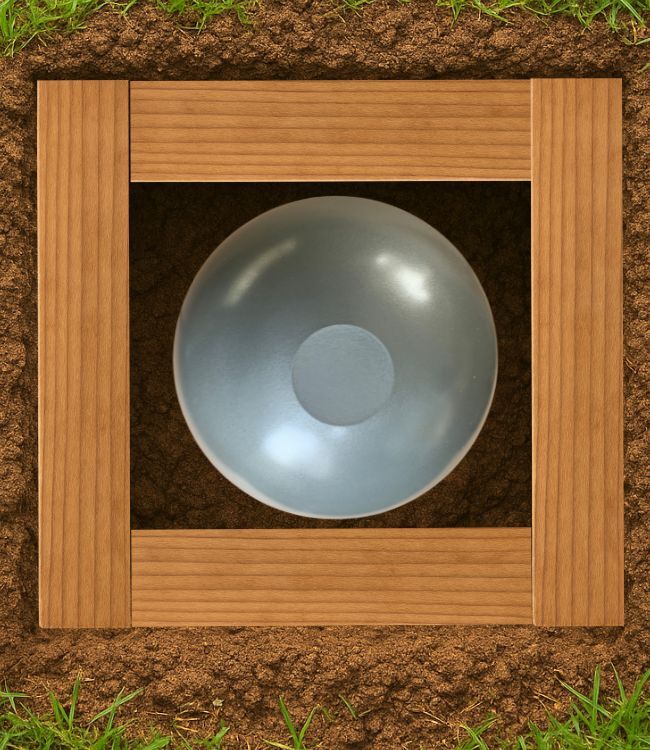
Some customers choose to place their time capsule inside a simple ground sleeve to make future retrieval easier.
This step is optional and not required.
Common assisted placement options include:
-
A short section of PVC pipe with a removable cap
-
A simple treated-wood enclosure with a soil-covered lid
This method does not affect the sealing performance of the time capsule and is entirely preference-based.
5. Record the Placement Location
Before completing placement:
-
Privately record the location using GPS coordinates or a personal map
-
Note the placement date and intended retrieval timeframe
-
Leave the time capsule undisturbed until the planned retrieval date
Additional considerations
-
In humid or coastal environments, additional desiccant is recommended
-
In cold climates, consider placing below the frost line
A Meaningful, One-Time Process
Once sealed and placed, your time capsule requires no ongoing maintenance.
It’s designed to protect meaningful items today — and preserve them for discovery in the future.