
How to Install and Bury And Seal Your Hidden Safe the Right Way
Most users bury the vault with 8-10 inches of soil covering the safe — hidden yet easy to access.
Simple Quick-Access Installation Tip
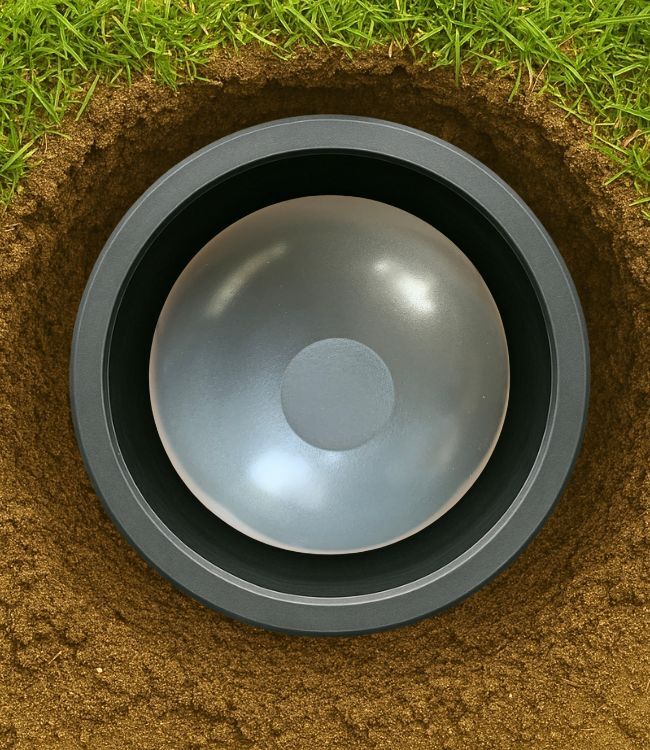
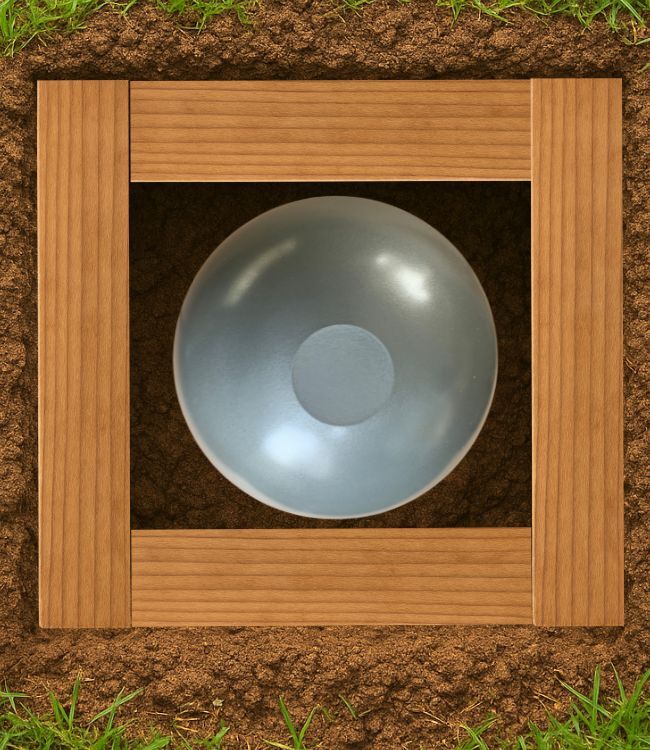
Optional Setup for Frequent, Quick, and Discreet Removal
If you plan to lift the safe out often, the 2 images above show an easy method to make removal smoother. This is completely optional—the safe works as intended even without this setup. The safe on the left is in a PVC sleeve and the safe on the right is in a pressure treated lumber sleeve.
Materials (not included):
-
10" diameter × 24" long PVC pipe
-
Threaded PVC cap
How to Prepare the Pipe:
-
Cut the pipe to roughly 24" in length.
-
Place it vertically in your chosen spot.
-
Backfill around the outside of the pipe to keep it secure.
-
Place the cap on the pipe and backfill with dirt.
Helpful Tip:
-
While PVC makes frequent access simple, it’s not required.
-
Some customers have shared success with a basic square enclosure built from treated 2×10 lumber. Add a simple lid and cover with soil and you’ll have a similar “vault-style” opening that also allows quick access when needed.
Tips For Packing Items In Your Safe
Step 1: Pack Your Items the Right Way
-
Keep everything completely dry before sealing.
-
Place documents or cash in archival-quality or high-quality zip-seal bags or food containers, especially paper or currency.
-
Add silica-gel moisture-absorbing packs inside each bag and inside the safe.
-
For gold or silver, if desired, use separate small pouches or anti-tarnish bags.
-
Electronics (like thumb drives) should be packed in anti-static bags with desiccant added inside.
Best
-
If possible, use heat-sealed food-grade bags for the best long term protection.
Step 3: Bury in the Right Spot
- Pick a stable location way from flooding or pooling water.
- Bury with about 8-10 inches of cover for easy access, or deeper for extra security.
- For quick removal, insert a 24-inch long PVC pipe (as shown above) with a threaded cap into the ground first, backfill with dirt around it, then place the safe inside and cap it. Just remove a little soil to uncover the cap later when needed — simple and discreet.
Step 4: Mark and Maintain
- Record the location privately (GPS or a small map).
- Leave it undisturbed until needed; the HomeEarth Safe is designed for long-term underground security.
Tip: In humid or coastal climates, use extra desiccants and sealants. In cold regions, bury below the frost line for best results.
Your valuables deserve more than a drawer or box — protect them with a Hidden Safe built for true self-reliance and long-term security.